

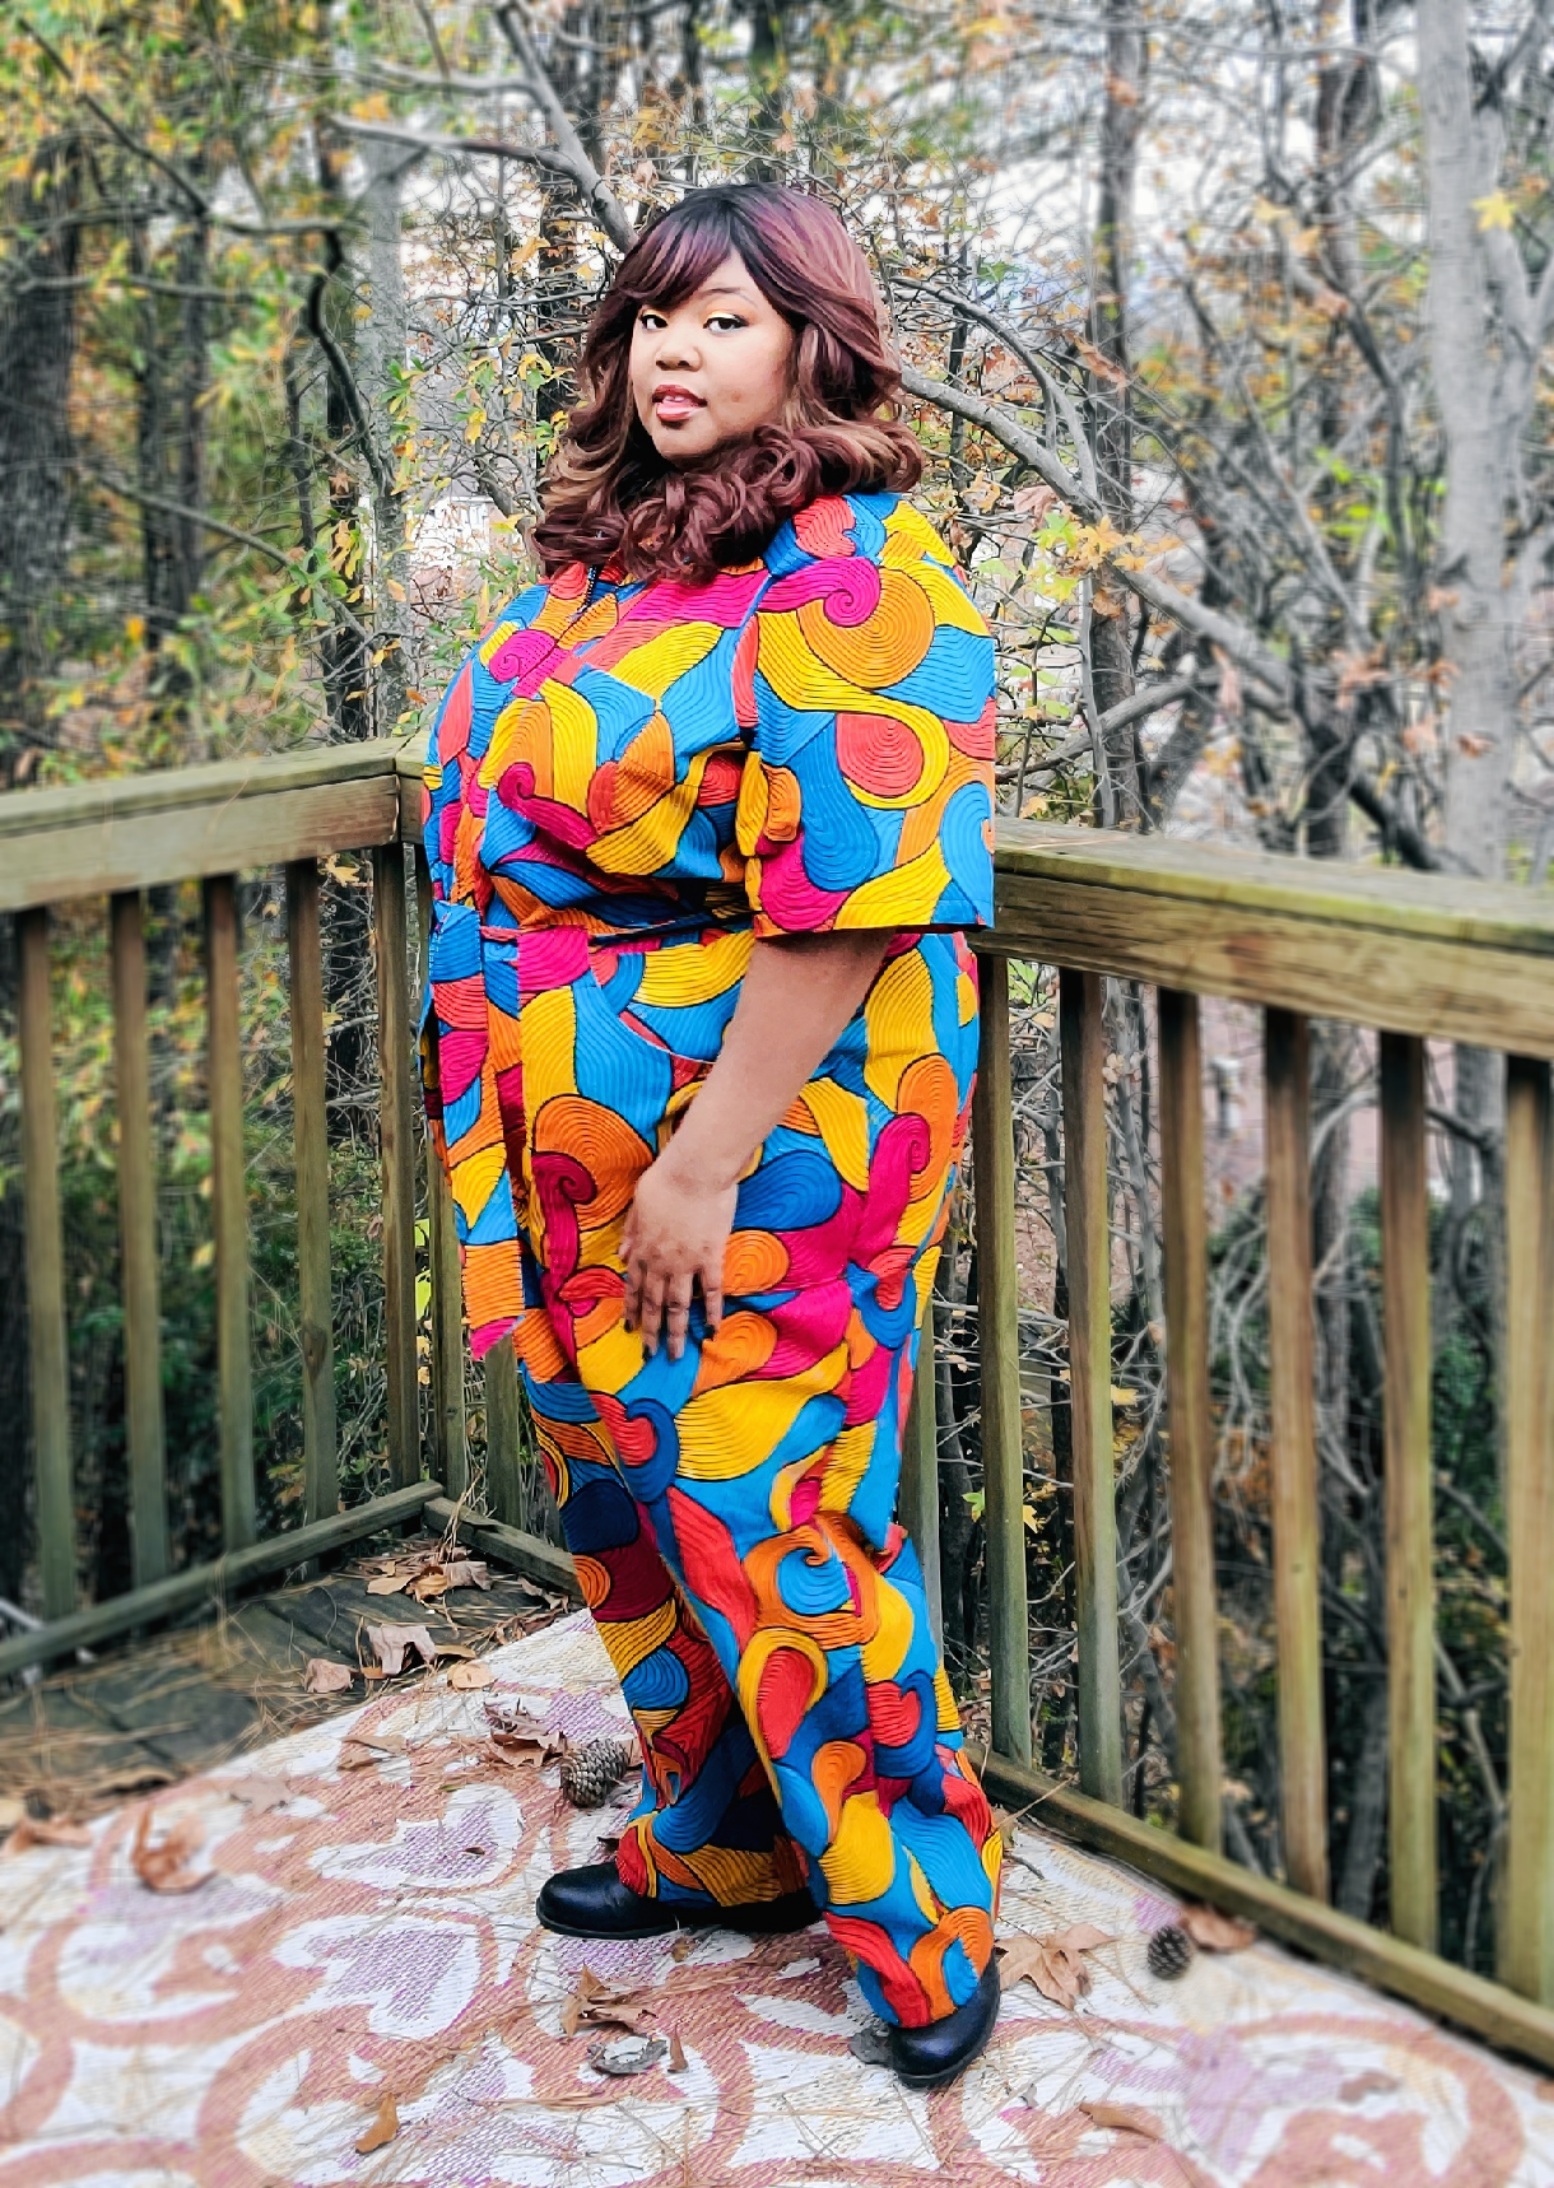
When I first heard of the Blanca Flight Suit from Closet Core Patterns, I immediately started singing the “Blanca Toothpaste” jingle from Living Single in my head. Apparently, the episode aired in December 1997 – whew, I’m old! Anyhoo, while the name of this flight suit evoked memories from 20+ years ago, once I actually made it, it gave me a full-on 70s fantasy. I think the combination of my waxprint’s colorful swirls with the relaxed silhouette from the pattern slightly reminds me of a fashionable leisure suit. The fabric I used is a waxprint from AKN Fabrics. I purchased it over a year ago, so I doubt it’s still available for purchase. The Blanca Flight Suit pattern is available now, however, and comes in sizes 0-32.
There are so many options in this pattern that it’s really easy to customize it to your liking. For my version, I combined the long straight leg, short sleeves, tie belt, and classic breast pockets. You can also make a cropped leg version, taper the leg with a tab, add zippered breast pockets, make a buckle belt, and make long sleeves. I originally wanted to make the long-sleeved version, but I didn’t quite have enough fabric for that.

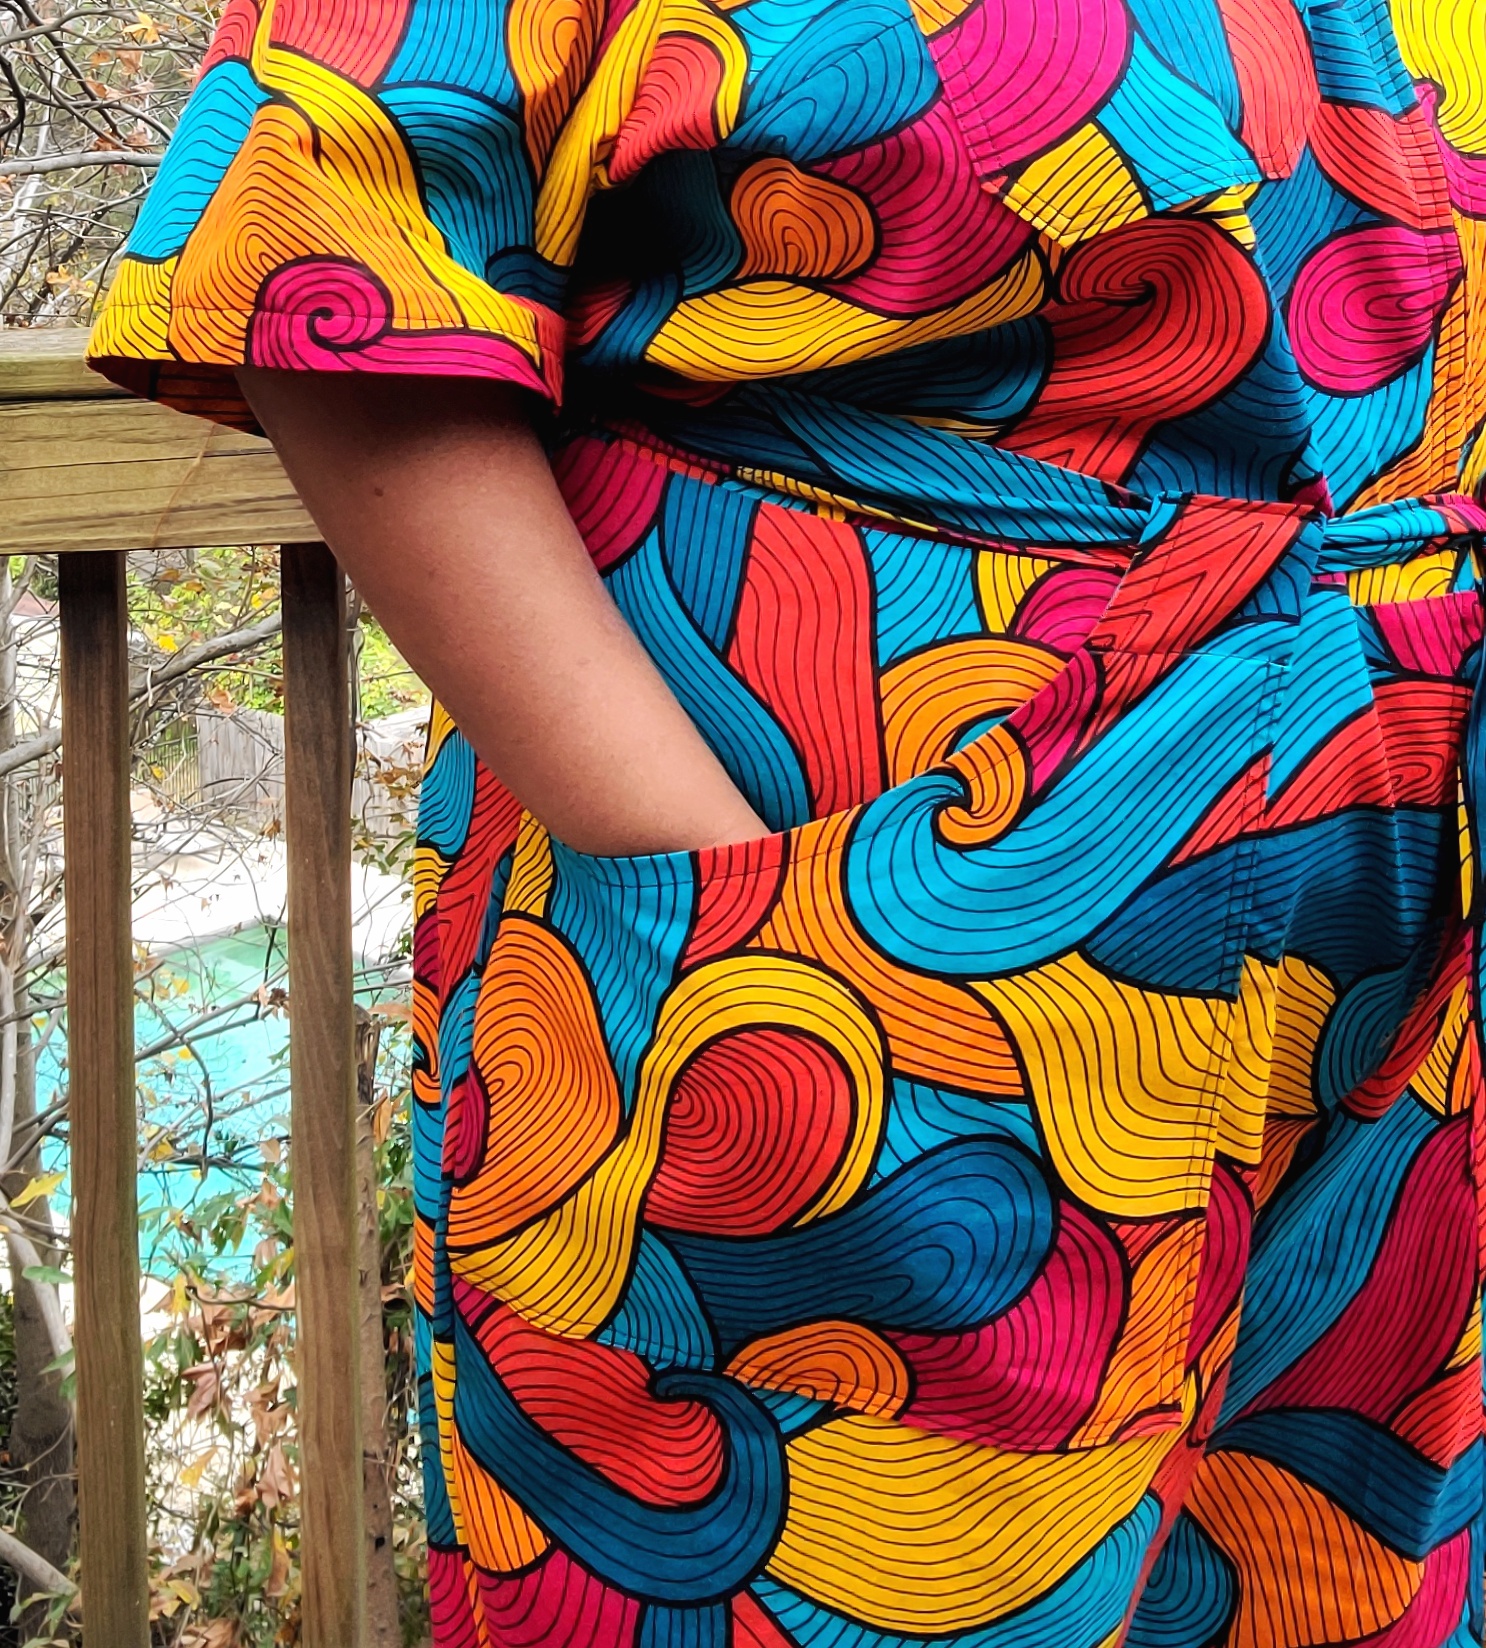
In addition to all the options, there are some really cool design elements in this flight suit. First are the large, fully lined pockets. Just like the pockets on Seamwork’s Francis Coat, the pockets double as belt loops. I also used leftover lining from my Francis to line the pockets. The second design element I really liked are the pintucks on the back bodice. The pintucks act as darts to improve the fit, but they are so pleasing to the eyes. Thirdly is the long front zipper. To be completely honest, finding the right length zipper was the hardest part of making this jumpsuit. Do you know how hard it is to find a 26-inch non-separating zipper? For me, it proved to be impossible. I ended up getting a separating zipper and then closing the end myself. I really love the look of the zipper though, so the extra effort was worth it. Once I had all my supplies, the actual sewing was a breeze! I worked on this after work over the course of a week.
One thing about this flight suit is that it’s designed to sit about an inch below your natural waist. As a person who prefers a nipped in waist, this was really hard for me to get accustomed to. While I was trying it on, I kept pulling it up and then reminding myself that it’s meant to be lower. Eventually, I belted the flight suit where it was meant to be and just kind of eased into the fit. I found it helpful to have a more relaxed fit through the waist and thighs, so I changed my side seam allowance from 5/8 to 3/8. It’s a small change that really made a world of difference in how the garment hangs off me. The sleeves are a bit too large for me, but that’s partially my fault. I almost always have to sew sleeves in a size or two smaller than the rest of the garment, but I didn’t do that this time. Thankfully, this suit looks great with folded up sleeves, so I’ll play around with it to find a fit that I prefer. I may even add a snap on the sleeve from some of my fabric scraps. This is such a cool garment that can be styled so many ways. I think the next time I make it, I’ll try a solid fabric so the design details I adore really pop!


1 comment